 Pin it
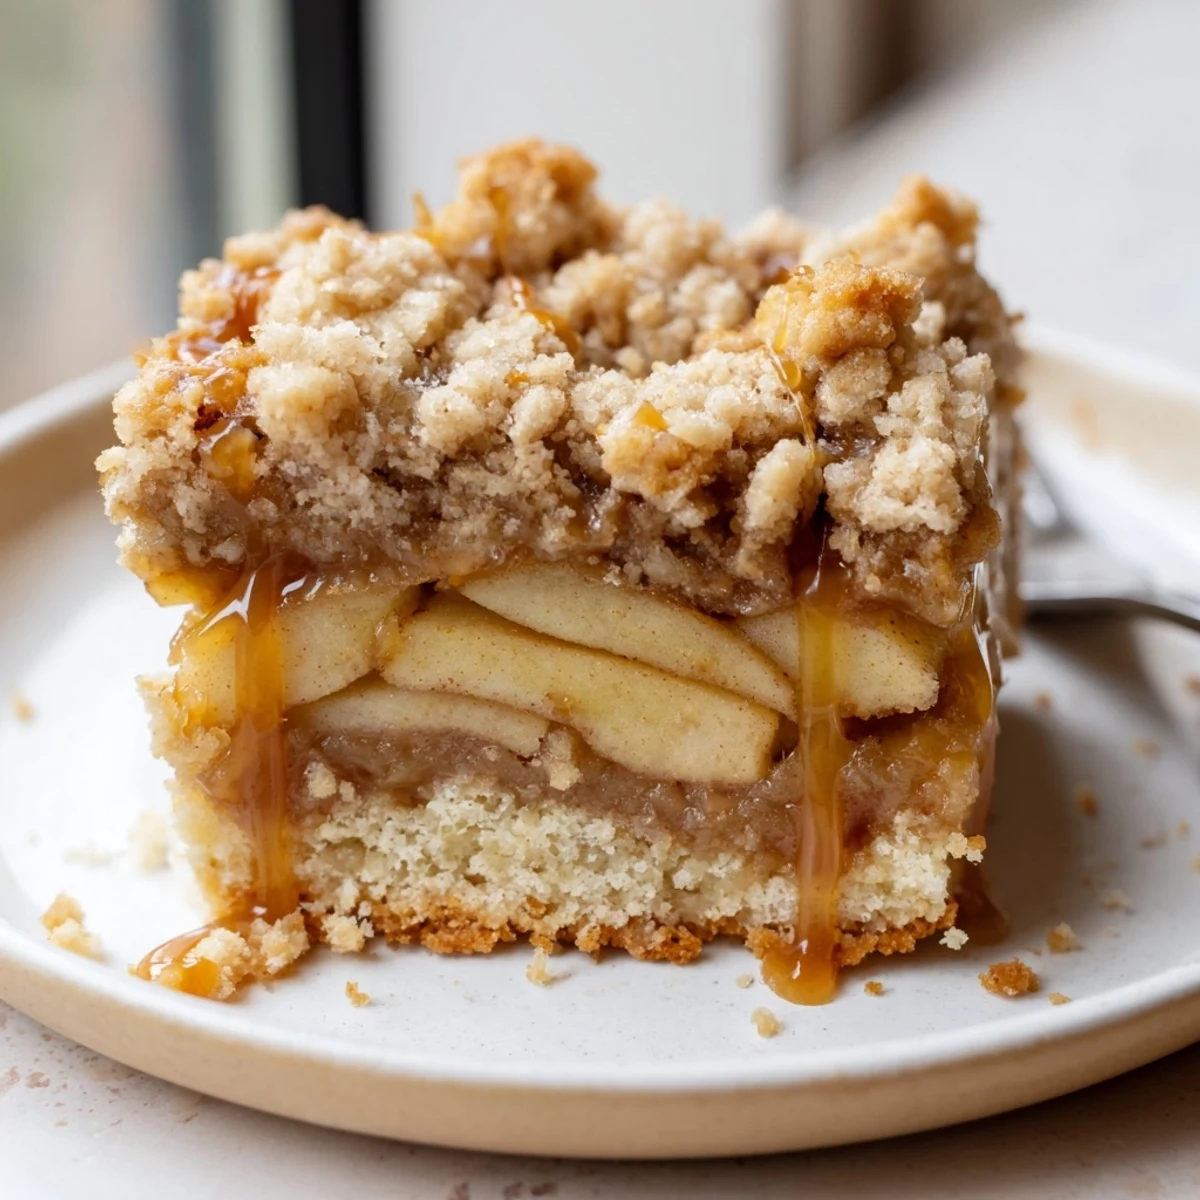
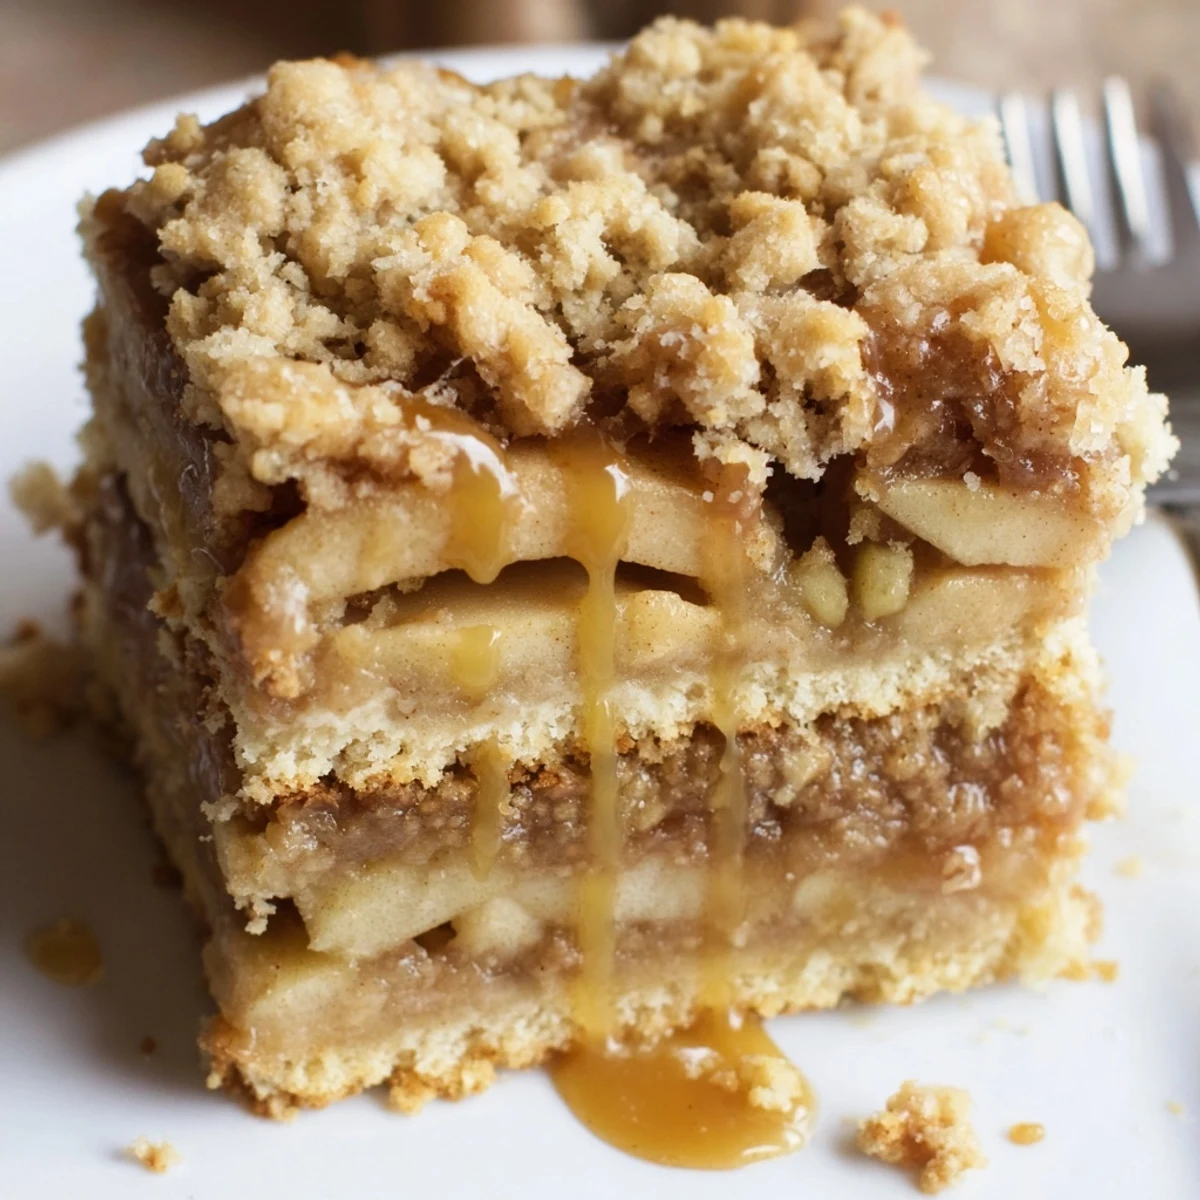
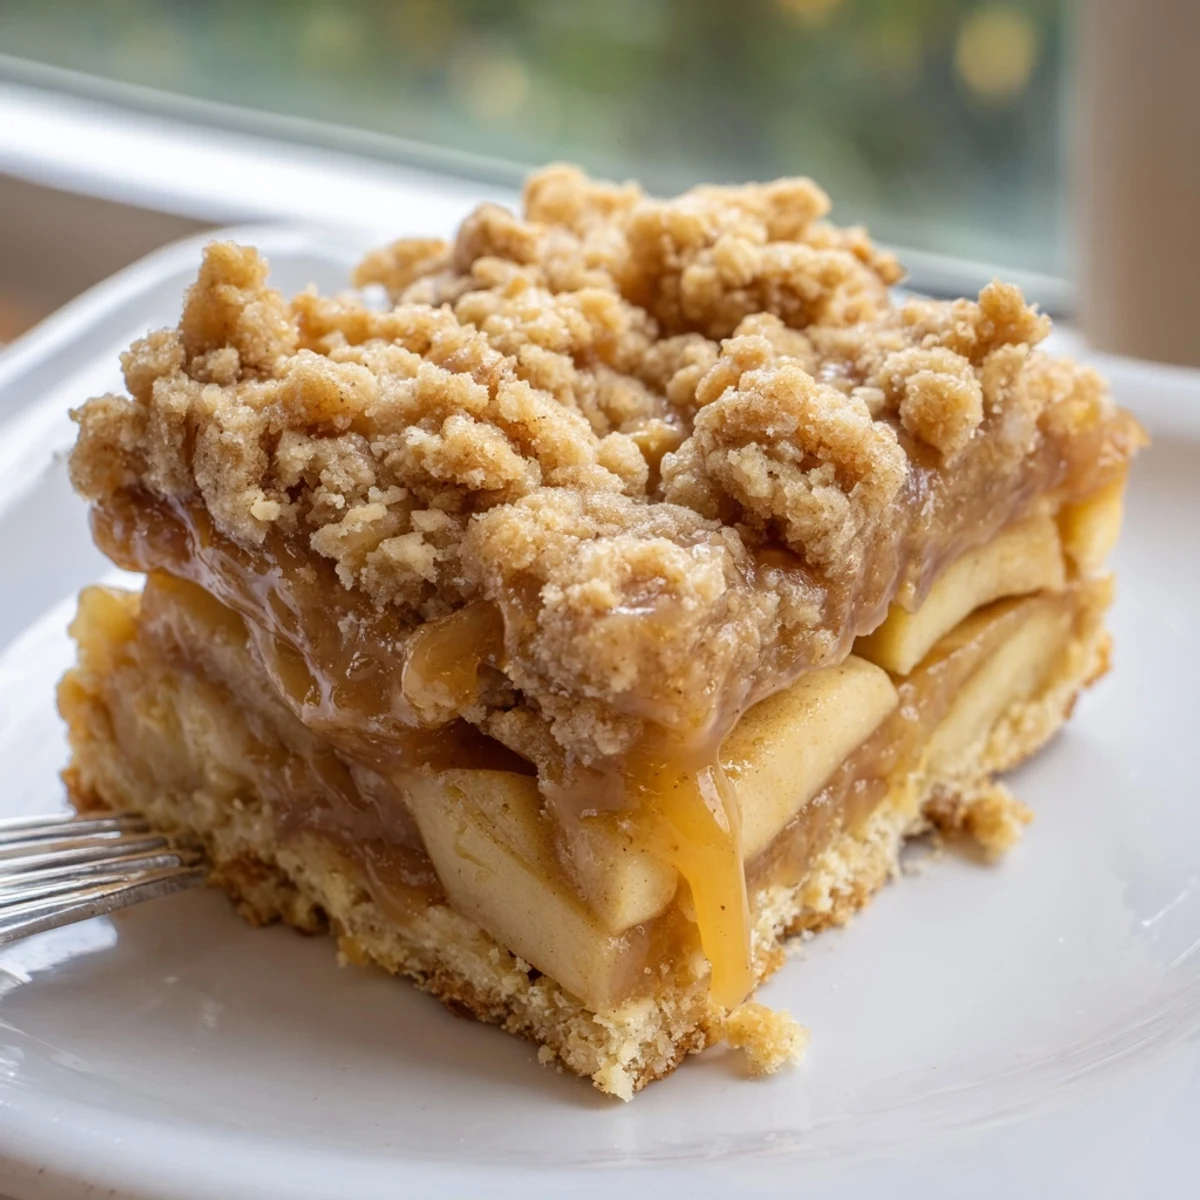
 These caramel apple crumb bars feature three irresistible layers: a tender vanilla short crust, thinly sliced apples tossed with cinnamon sugar, and generous swirls of caramel sauce. Everything gets crowned with a buttery crumble topping that bakes golden.
The bars come together in just over an hour, with most of that time being hands-off while they bake. The tart apples balance perfectly against the sweet caramel, while the short crust provides a satisfying crunch that holds everything together.
Serve them warm with a drizzle of extra caramel, or let them cool completely for neat, portable squares. They're ideal for autumn gatherings, holiday dessert tables, or whenever you're craving the flavors of fall in a format that's easier to share than traditional pie.
My apartment smelled like autumn itself the first time I made these bars. I had three apples sitting on my counter that were begging to be used, and somehow I ended up with this caramel apple creation that made my roommate poke her head into the kitchen asking what magic I was up to.
I brought these to a potluck last November and watched them disappear in twenty minutes flat. My friends friend actually asked if I had a bakery hidden somewhere, which might be the best compliment Ive ever received in the kitchen.
Ingredients
- 2 1/2 cups all-purpose flour: This forms the foundation of both your crust and crumb topping, so measure it properly for the best texture
- 1 cup unsalted butter, cold and cubed: Keeping this cold is what creates those beautiful tender crumbs that melt in your mouth
- 3/4 cup granulated sugar: Just enough sweetness to make the shortbread sing without overpowering the apples
- 1/2 teaspoon salt: Dont skip this. It balances all that sweetness and makes the flavors pop
- 1 teaspoon vanilla extract: Pure extract makes a noticeable difference here. Ive tried both and the real stuff is worth it
- 3 medium apples: A mix of tart and sweet apples like Granny Smith and Honeycrisp will give you the most interesting flavor profile
- 2 tablespoons lemon juice: This keeps your apples from turning brown and adds a bright note that cuts through the caramel
- 1/3 cup granulated sugar: This helps the apples release their juices and creates that syrupy filling we all want
- 1 tablespoon all-purpose flour: Just enough to thicken those apple juices into something jammy rather than soupy
- 1 teaspoon ground cinnamon: The spice that makes everything taste like fall and comfort
- 1/2 cup caramel sauce: Storebought is perfectly fine but homemade will make these absolutely unforgettable
Instructions
- Get your oven and pan ready:
- Preheat to 350°F and line a 9x9 inch pan with parchment. That overhang is going to save you later when lifting the bars out.
- Make the crumb mixture:
- Whisk flour, sugar, and salt together. Cut in cold butter until it looks like coarse crumbs. Some larger pea sized pieces are good here. Stir in vanilla.
- Reserve your topping:
- Measure out about 1 1/2 cups of the mixture and set it aside for later. This will be your beautiful golden topping.
- Press in the crust:
- Take the remaining dough and press it firmly into the bottom of your pan. Use the bottom of a measuring cup to get it even.
- Par bake the crust:
- Bake for 12 minutes until it just starts to set. This step prevents a soggy bottom later.
- Prep the apples:
- Toss your sliced apples with lemon juice, then add sugar, flour, and cinnamon. Mix until every piece is coated.
- Layer it all up:
- Spread apples over the hot crust. Drizzle that caramel sauce all over the apples. Sprinkle your reserved crumbs on top.
- Bake until golden:
- Bake for 28 to 32 minutes until the topping is light golden brown and you can see the apples bubbling underneath.
- Patience is key:
- Let them cool completely in the pan. This is hardest part but it makes cutting so much easier. Lift them out and slice into 16 bars.
 Pin it
 These have become my go to when I need to bring something that feels special but doesnt require me to be stressed about it. Theres something about that combination of caramel and apple that just makes people feel taken care of.
Choosing Your Apples
I used to just grab whatever apples were on sale, but then I discovered that using a mix of tart and sweet varieties makes such a difference. Granny Smiths hold their shape beautifully while something sweeter like Honeycrisp or Gala adds that aromatic complexity we all want in a fall dessert.
Making Ahead
These bars actually taste better the next day when all those flavors have had time to get to know each other. I often make them the night before a gathering and store them at room temperature, though I have to hide them in the back of the pantry or my family will pick at them before guests even arrive.
Serving Suggestions
These are wonderful slightly warmed with a scoop of vanilla ice cream, but honestly they are perfect on their own with a cup of coffee. The crumb topping gets slightly more substantial if they sit overnight, which I actually prefer for the texture contrast.
- A little extra drizzle of caramel right before serving makes them look extra special
- A pinch of flaky sea salt on top creates that salted caramel effect everyone loves
- These freeze beautifully if you want to stash some for later
 Pin it
 There is something so satisfying about a recipe that turns simple ingredients into something that feels like a hug in dessert form. I hope these bring as much warmth to your kitchen as they have to mine.
Recipe FAQs
- → What apples work best for these bars?
-
A mix of tart and sweet apples gives the best balance. Granny Smith, Honeycrisp, or Braeburn hold their shape well during baking. Avoid very soft varieties that can turn mushy.
- → Can I make the caramel sauce from scratch?
-
Absolutely. Homemade caramel adds a rich, fresh flavor. If making your own, let it cool slightly before drizzling—it should be pourable but not hot enough to cook the apples prematurely.
- → Why do I need to chill the butter?
-
Cold butter creates those distinct crumbly pieces in both the crust and topping. If the butter softens too much, the dough becomes sticky and won't produce that desired texture. Work quickly and keep everything cool.
- → How do I know when the bars are done?
-
The crumb topping should be light golden brown, and you'll see bubbling around the edges from the apples and caramel. A skewer inserted into the center should meet little resistance from tender apples.
- → Can these be made ahead?
-
Yes, these bars actually taste better the next day as flavors meld. Store in an airtight container at room temperature for up to 3 days. For longer storage, wrap well and freeze for up to 2 months.
- → What if I don't have a 9x9 pan?
-
An 8x8 inch pan works but will yield thicker bars with slightly longer baking time. A 9x13 inch pan will make thinner bars—reduce baking time by about 5 minutes and watch closely.