 Pin it
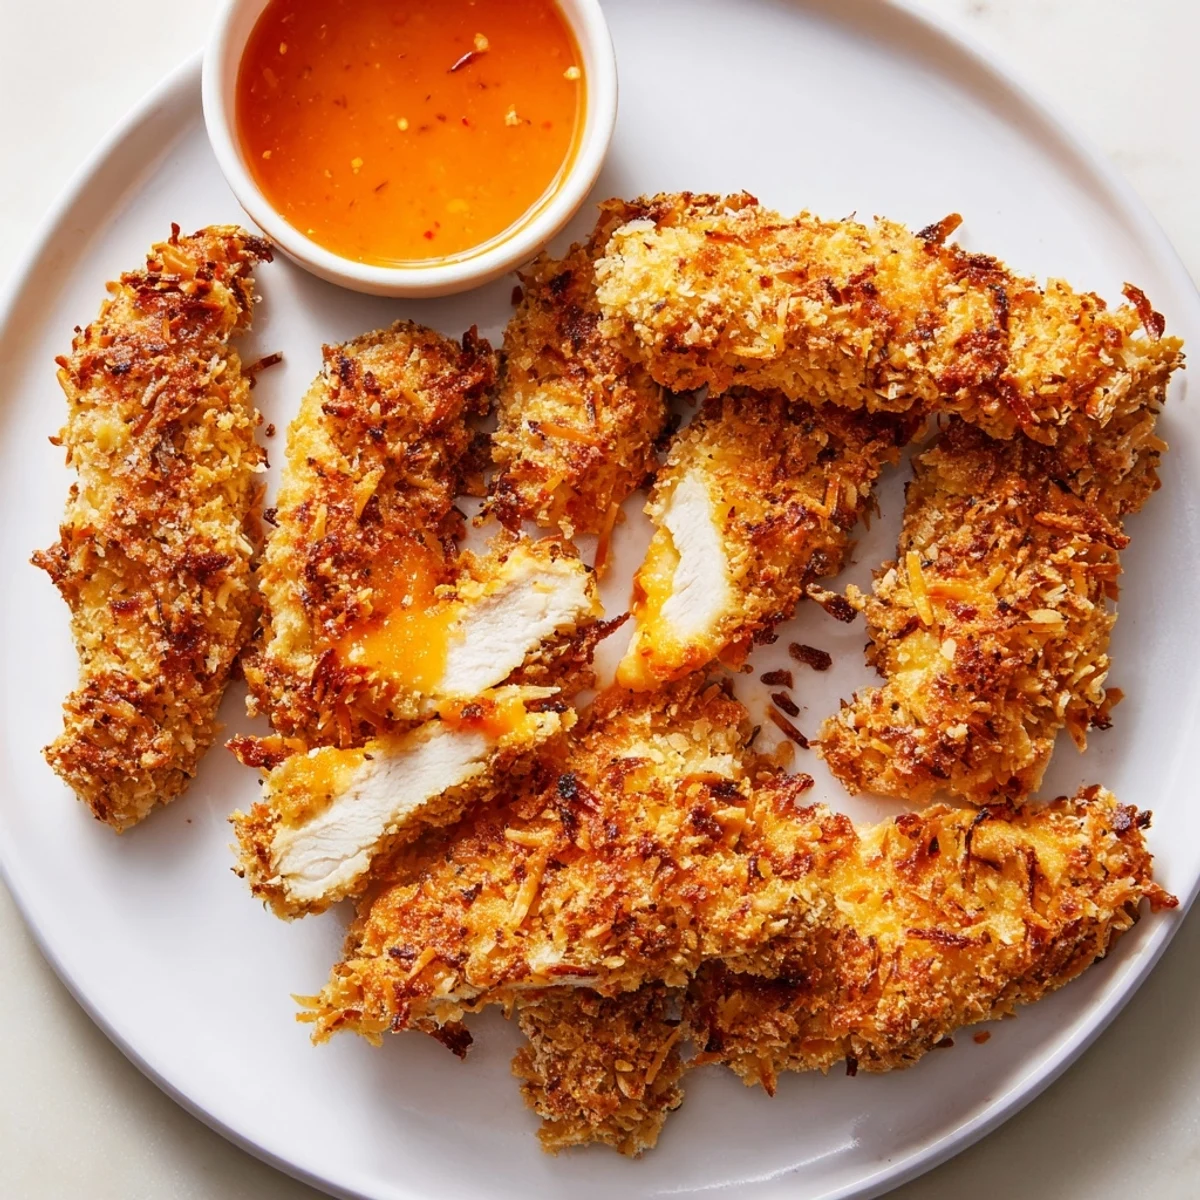
 These crunchy coconut chicken strips feature juicy boneless chicken coated in a crispy blend of shredded coconut and panko breadcrumbs. Seasoned flour and beaten eggs create the perfect breading station for maximum adhesion and crunch.
Choose between baking for a lighter option or pan-frying for extra crispiness. Ready in just 40 minutes, they make an excellent main dish paired with rice, salad, or your favorite dipping sauce like sweet chili or mango chutney.
Naturally dairy-free and easy to adapt for gluten-free diets, this tropical-inspired dish delivers satisfying texture and flavor the whole family will enjoy.
The sizzle of coconut hitting hot oil is one of those kitchen sounds that makes everyone wander in and ask what is cooking. My sister walked through the door last summer with a bag of shredded coconut and a mission, declaring she had eaten something similar at a beach shack and could not stop thinking about it. We spent the afternoon experimenting with different coatings until we landed on this version, which has since become our go-to for casual dinners and impromptu gatherings. The combination of panko and coconut creates a crust that snaps when you bite into it while the chicken stays remarkably juicy inside.
I made a double batch for a neighborhood potluck and watched a plate of forty strips vanish in under ten minutes. My neighbor Mark, who claims he does not like coconut, ate six of them before I mentioned what the coating was. His wife still brings it up every time coconut anything is served, and he still pretends he was just being polite.
Ingredients
- 600 g boneless skinless chicken breasts or tenders: Cutting them into even strips ensures every piece cooks at the same rate, so nothing dries out or stays raw in the center.
- 70 g all-purpose flour: This first coat creates a dry surface for the egg to grip, which is the foundation of a crust that actually stays on.
- 1 tsp salt: Do not skip this or be shy with it, because the flour layer is your chance to season the chicken directly through its coating.
- 1/2 tsp black pepper: Freshly ground makes a noticeable difference here since the coating is fairly delicate in flavor.
- 1/2 tsp garlic powder: It disperses evenly through the flour and gives the crust a savory backbone that balances the sweetness of coconut.
- 2 large eggs beaten: Room temperature eggs coat more smoothly and create a better glue between the flour and the coconut panko mixture.
- 90 g unsweetened shredded coconut: Unsweetened is critical because sweetened coconut burns before the chicken cooks through and throws off the entire flavor.
- 60 g panko breadcrumbs: Panko mixed with coconut gives you air pockets that fry up lighter and crunchier than regular breadcrumbs ever could.
- Vegetable oil for frying: About an inch in the pan is all you need, and a neutral oil lets the coconut flavor shine without competition.
- Sweet chili sauce or mango chutney optional: Either one is a worthy companion, and honestly you might want both because people will argue about which is better.
Instructions
- Set up your cooking method:
- If baking, preheat the oven to 200 degrees Celsius which is 400 Fahrenheit, line a baking sheet with parchment, and give it a light slick of oil so nothing sticks. If frying, get your skillet ready but hold off on the oil until the chicken is coated and standing by.
- Build your breading station:
- Set out three shallow bowls side by side because this is a one-hand operation if you plan it right. Mix the flour with salt, pepper, and garlic powder in the first bowl, beat the eggs in the second, and toss the coconut and panko together in the third.
- Coat each strip in three stages:
- Dredge a strip through the seasoned flour and shake off the excess so you get a thin even layer rather than clumpy patches. Dip it into the egg, let the extra drip off, then press it firmly into the coconut panko mixture on all sides, really pressing with your palms so the coating adheres with no bald spots.
- Cook until gloriously golden:
- For baking, arrange the strips on the sheet with space between each one, spray or brush lightly with oil, and bake 18 to 22 minutes flipping halfway through until the coconut is deeply toasted and the chicken reads 74 degrees Celsius inside. For frying, heat the oil over medium until a shred of coconut sizzles on contact, then cook strips in batches for 2 to 3 minutes per side until they are burnished and crisp, draining briefly on paper towels.
- Serve immediately with dipping sauce:
- These are at their absolute best within the first ten minutes out of the oven or pan when the crust is still singing with crunch. Pile them on a platter with a bowl of sweet chili sauce and watch how quickly they disappear.
 Pin it
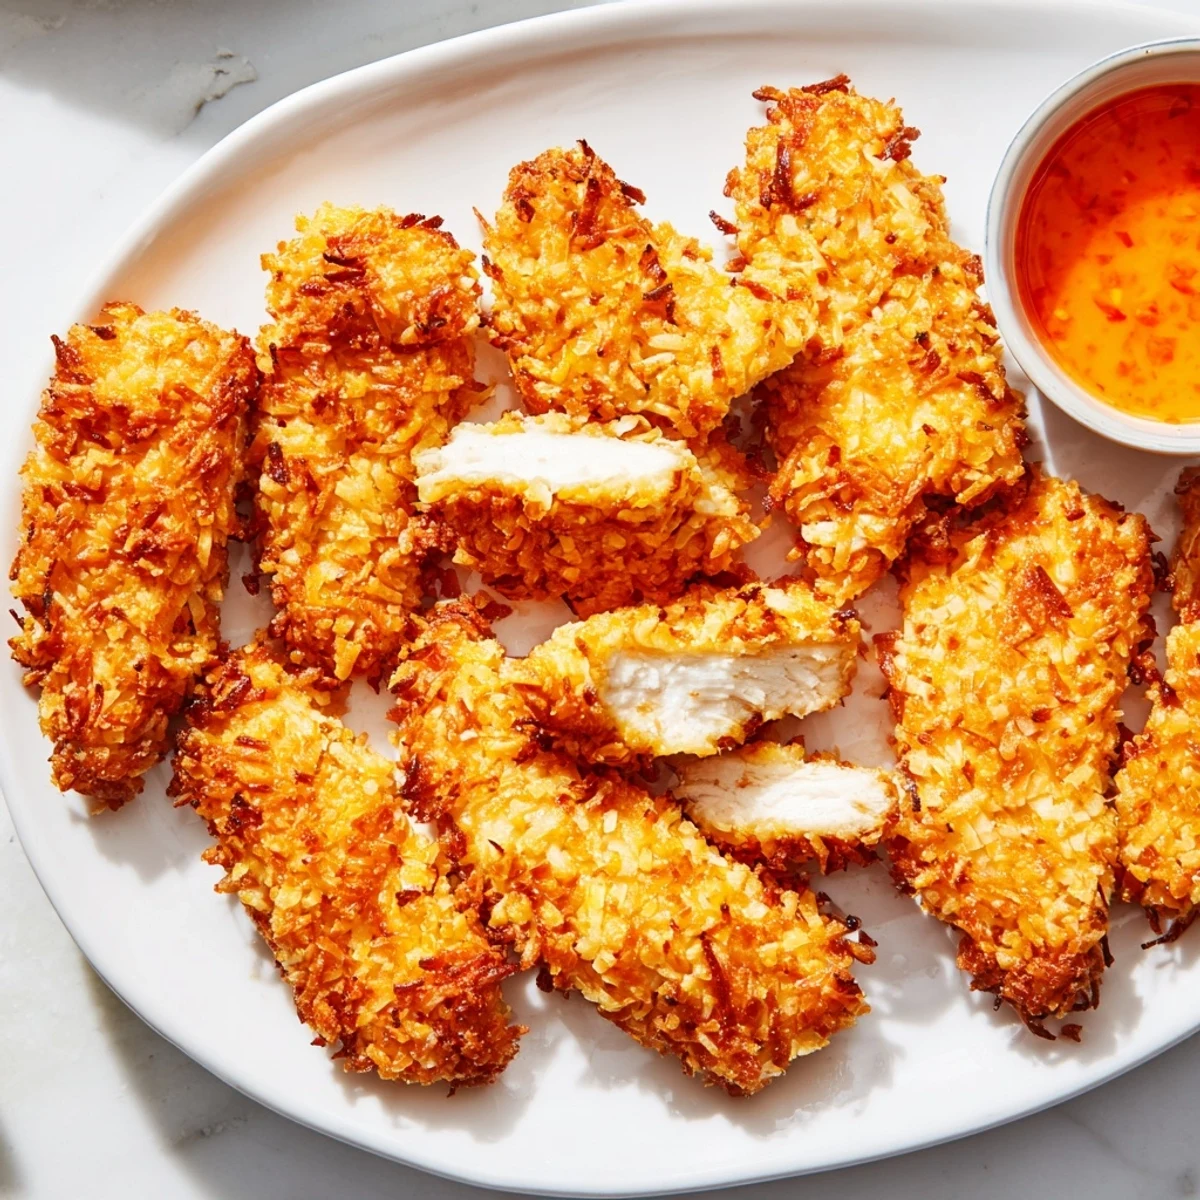
 There is something about a platter of these golden strips that turns a regular Tuesday dinner into a small celebration. I have watched toddlers and grandparents alike grab seconds without hesitation, which in my experience is the most honest rating system there is.
Making It Your Own
A pinch of cayenne in the flour mixture wakes everything up without making it spicy, and a squeeze of lime over the finished strips adds a brightness that makes the coconut taste even more tropical. I once added a teaspoon of curry powder to the flour on a whim and it was so good I nearly did not share any of them.
Handling Leftovers
Leftover strips reheat surprisingly well in an air fryer set to 190 degrees Celsius for about five minutes, which brings back much of the original crunch. They also make an excellent cold snack straight from the refrigerator the next day, though in my house there are rarely any left to store.
Serving Suggestions Worth Trying
These strips are versatile enough to anchor a meal or disappear as finger food at a party. Pair them with a simple mango salsa, pile them over coconut rice, or stuff them into a soft roll with a slather of mayo and shredded lettuce for a sandwich that feels far more special than the effort required.
- A side of pickled cucumber and carrot cuts through the richness beautifully and takes about ten minutes to throw together.
- For a party spread, arrange them around a bowl of mango chutney and another of sweet chili so guests can choose their own adventure.
- Always make more than you think you need because people will eat them faster than you expect.
 Pin it
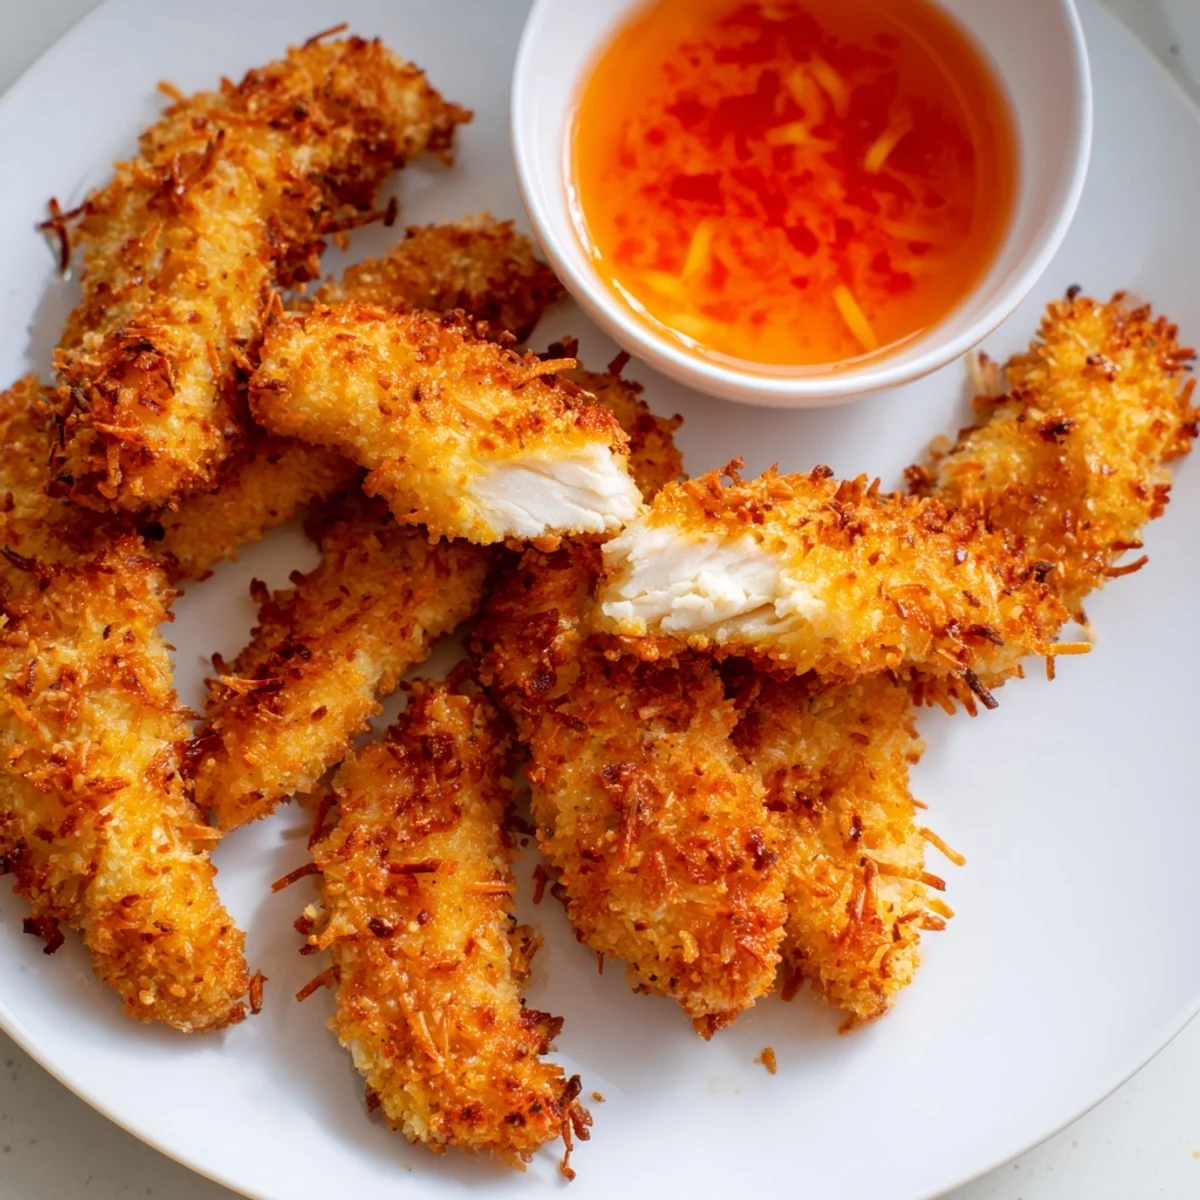
 Keep this recipe close because once someone you love tastes these coconut chicken strips, they will ask for them again and again. That is simply how it goes with food this crunchy and golden and full of sunshine.
Recipe FAQs
- → Can I bake these coconut chicken strips instead of frying?
-
Yes, absolutely. Arrange the coated strips on a parchment-lined baking sheet, lightly spray or brush with oil, and bake at 200°C (400°F) for 18–22 minutes, turning halfway through. They come out golden and crispy with less oil.
- → How do I get the coconut breading to stick to the chicken?
-
Follow the three-step breading process: dredge in seasoned flour first, dip in beaten eggs second, then press firmly into the coconut-panko mixture. The flour helps the egg adhere, and the egg acts as the glue for the crispy coating.
- → What dipping sauces pair well with coconut chicken?
-
Sweet chili sauce and mango chutney are excellent choices that complement the tropical coconut flavor. You can also serve them with honey mustard, teriyaki sauce, or a creamy sriracha mayo for a spicy kick.
- → Can I make this dish gluten-free?
-
Yes, simply substitute the all-purpose flour with a gluten-free flour blend and use gluten-free panko breadcrumbs. All other ingredients are naturally gluten-free, so the adaptation is straightforward.
- → How should I store and reheat leftover coconut chicken strips?
-
Store leftovers in an airtight container in the refrigerator for up to 3 days. To reheat and restore crispiness, place them in a preheated oven at 190°C (375°F) for about 10 minutes. Avoid microwaving as it will make the coating soggy.
- → What cut of chicken works best for this dish?
-
Boneless, skinless chicken breasts or tenders both work well. Cut them into even strips about 2-3 inches long so they cook uniformly. Chicken tenders are convenient since they require minimal trimming before coating.