 Pin it
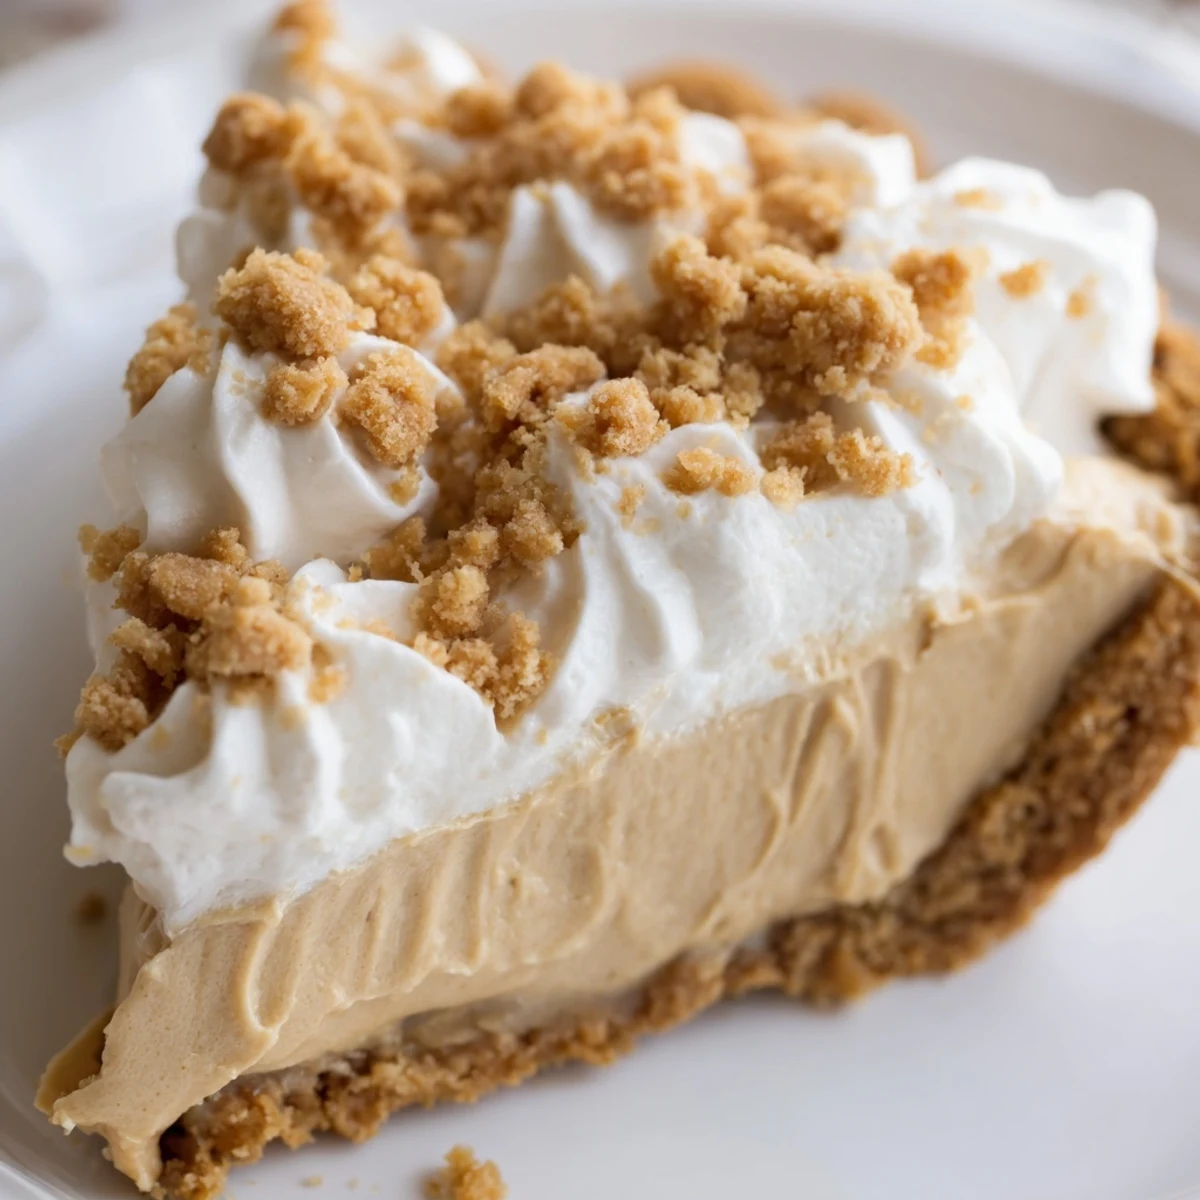
 This old-fashioned Amish peanut butter dream pie combines rich, creamy peanut butter filling with a nostalgic dessert tradition. The luscious custard-style filling is made from scratch on the stovetop, layered with sweet peanut butter crumbs inside a crisp pie shell. After chilling until perfectly set, the pie is topped with freshly whipped cream and a final sprinkle of crumbled peanut butter mixture. The result is a velvety, dreamy dessert that balances sweet and savory flavors beautifully. Ready in just over 3 hours with only 25 minutes of active preparation, this comforting classic serves eight generously.
The smell of peanut butter always takes me back to my grandmother's kitchen, where she'd measure ingredients by the handful and smile when I asked about exact measurements. This Amish peanut butter pie appeared on her table every summer Sunday dinner, its creamy filling shimmering in the afternoon light through the window. I finally coaxed the recipe out of her one afternoon while we shelled peas on the porch. Now whenever I make it, I can practically hear her laughter and feel that easy contentment that comes from simple comfort food done right.
My neighbor Mrs. Higgins brought this over when I was recovering from surgery last winter. I took one bite and called her immediately, demanding the recipe before I'd even finished the first slice. Now whenever someone needs comfort or celebration, this pie is my automatic response because it never fails to make people close their eyes and smile.
Ingredients
- 1 9-inch prepared pie crust: Use a good quality store-bought crust or bake your favorite homemade recipe ahead of time. The crust needs to be completely cooled before filling.
- 3/4 cup creamy peanut butter: I prefer a standard commercial brand like Jif for the smoothest texture, but any creamy peanut butter works beautifully.
- 1 cup powdered sugar: This combines with the peanut butter to create those signature sandy crumbs that make this pie so special.
- 2/3 cup granulated sugar: Sweetens the custard filling just enough without overshadowing that rich peanut butter flavor.
- 1/3 cup all-purpose flour: Thickens the custard to that perfect pudding-like consistency that holds its shape when sliced.
- 1/4 teaspoon salt: Just enough to enhance all the flavors and keep the sweetness from becoming cloying.
- 2 cups whole milk: Whole milk creates the richest, most velvety custard. Low-fat substitutes will result in a thinner, less luxurious filling.
- 3 large egg yolks: These create the silky, glossy texture that makes this custard so dreamy. Save the whites for another use.
- 1 teaspoon pure vanilla extract: Pure vanilla makes a noticeable difference here, blending seamlessly with the peanut butter.
- 2 tablespoons unsalted butter: Adds a final touch of richness and helps create that glossy finish on the custard.
- 1 cup heavy whipping cream: Whipped into clouds to crown the pie. Make sure it's well-chilled before whipping.
- 2 tablespoons powdered sugar: Sweetens the whipped cream just enough to complement without competing.
- 1/2 teaspoon vanilla extract: A little extra vanilla in the whipped cream ties everything together beautifully.
Instructions
- Make the magic crumbs:
- Combine the creamy peanut butter and powdered sugar in a medium bowl, working with a fork until the mixture transforms into sandy, crumbly bits that hold together when pressed.
- Layer the bottom:
- Press half of those crumbly peanut butter bits into the bottom of your cooled pie crust, creating an even foundation for the creamy filling.
- Start the custard base:
- Whisk together the granulated sugar, flour, and salt in a medium saucepan until well combined, then gradually whisk in the milk until the mixture is completely smooth.
- Cook until thickened:
- Place the saucepan over medium heat, whisking constantly until the mixture bubbles and thickens into a glossy pudding-like consistency, about 4 to 5 minutes. Youll know its ready when it coats the back of a spoon.
- Temper those eggs:
- In a separate bowl, whisk your egg yolks until smooth, then gradually whisk in about half a cup of the hot milk mixture, adding it slowly to prevent scrambling the eggs.
- Complete the custard:
- Pour the warmed egg mixture back into the saucepan, whisking constantly, and cook for another 2 minutes until the filling becomes thick and glossy. Remove from heat immediately.
- Add the finishing touches:
- Stir in the butter and vanilla extract until the butter melts completely and the custard becomes impossibly smooth and fragrant.
- Assemble the pie:
- Pour the warm custard over the peanut butter crumbs in your pie shell, then let it cool for about 15 minutes at room temperature before refrigerating for at least 2 hours until completely set.
- Prepare the crowning glory:
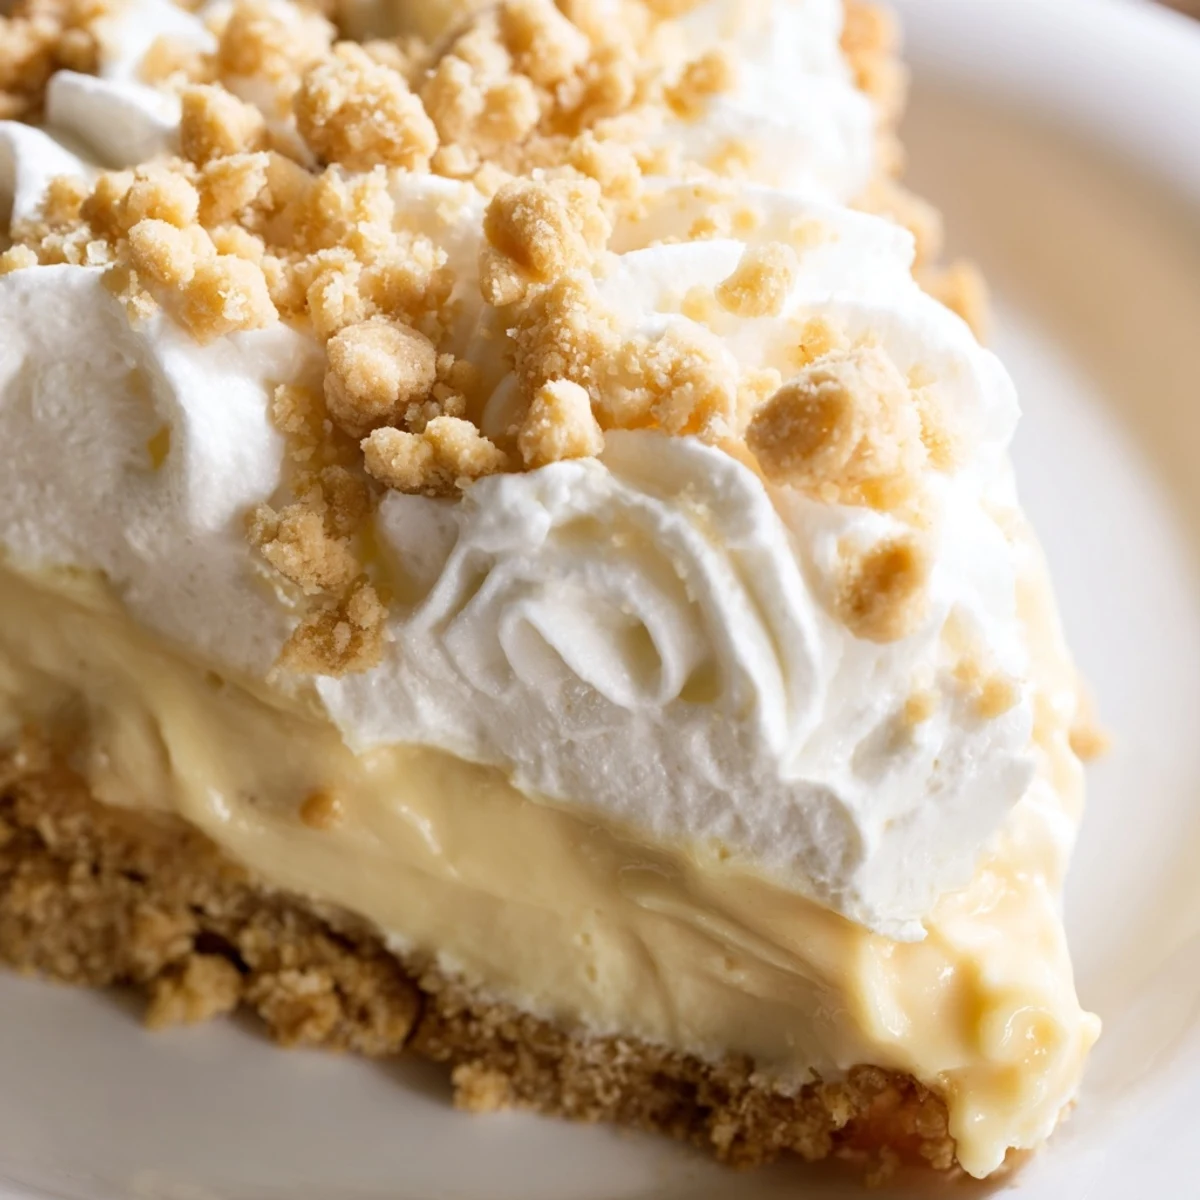
- Beat the heavy cream with the powdered sugar and vanilla until stiff peaks form, then spread this cloud-like topping generously over your thoroughly chilled pie.
- Add the final flourish:
- Sprinkle the remaining peanut butter crumbs over the whipped cream just before serving, creating that beautiful contrast of textures and flavors.
 Pin it
 Last summer, my daughter made this for the Fourth of July picnic entirely by herself while I supervised from a lawn chair. The look of pride on her face when everyone went absolutely silent after their first bites—then immediately asked for seconds—was better than any fireworks display. Now she claims this as her signature dessert, and honestly, I'm happy to hand over the whisk.
Getting The Texture Right
The custard needs to thicken enough to hold its shape but still feel silky on the tongue. I've learned that the moment bubbles appear and the mixture coats the back of a spoon, that's your signal to move to the next step. Overcooking makes it too dense, while undercooking means it won't set properly in the refrigerator.
Making It Your Own
Sometimes I'll drizzle melted chocolate over the top or fold chopped peanuts into the whipped cream for extra crunch. A chocolate crumb crust instead of traditional pie crust transforms it into something even more decadent. My sister-in-law adds a layer of sliced bananas between the custard and whipped cream, which tastes exactly like a gourmet peanut butter cream pie you'd find at a fancy bakery.
Serving Suggestions
This pie is rich enough that small slices satisfy even the deepest dessert cravings. I like to let it sit at room temperature for about 15 minutes before serving so the custard softens slightly. A cup of hot coffee or cold glass of milk alongside creates that perfect diner experience at home.
- The pie keeps beautifully in the refrigerator for up to 3 days, though it rarely lasts that long in my house
- If you need to transport it, wait until you arrive at your destination to add the whipped cream topping
- For a make-ahead version, prepare the pie through step 8 the day before and add the whipped topping just before serving
 Pin it
 There's something deeply satisfying about a recipe that turns humble pantry ingredients into something this special. This pie has become my go-to for bringing comfort to kitchen tables everywhere.
Recipe FAQs
- → How long should I chill the pie before serving?
-
Refrigerate the filled pie for at least 2 hours until completely set before adding the whipped cream topping. This ensures the creamy filling firms up properly and holds its shape when sliced.
- → Can I use a different type of nut butter?
-
While creamy peanut butter creates the classic taste, you can substitute with almond butter or cashew butter. Keep in mind the flavor profile will change, and some alternative nut butters may have different textures affecting the crumb consistency.
- → What's the best way to store leftover pie?
-
Store covered in the refrigerator for up to 3-4 days. The whipped cream topping may soften slightly over time but remains delicious. For best results, add any remaining peanut butter crumbs just before serving leftovers.
- → Can I make this pie ahead of time?
-
Absolutely. Prepare the pie through step 8 and refrigerate up to 24 hours in advance. Add the whipped cream topping and final crumb sprinkling no more than 4-6 hours before serving to maintain the freshest texture.
- → Why do I need to temper the egg yolks?
-
Tempering prevents the eggs from scrambling when added to the hot milk mixture. Whisking a small amount of hot liquid into the yolks first gradually raises their temperature, ensuring they incorporate smoothly into the filling without creating cooked egg bits.
- → Can I use a store-bought whipped topping instead?
-
Yes, frozen whipped topping can substitute for the homemade whipped cream. Thaw according to package directions and spread over the chilled pie. However, freshly whipped cream provides a lighter, more natural flavor that complements the rich filling beautifully.