 Pin it
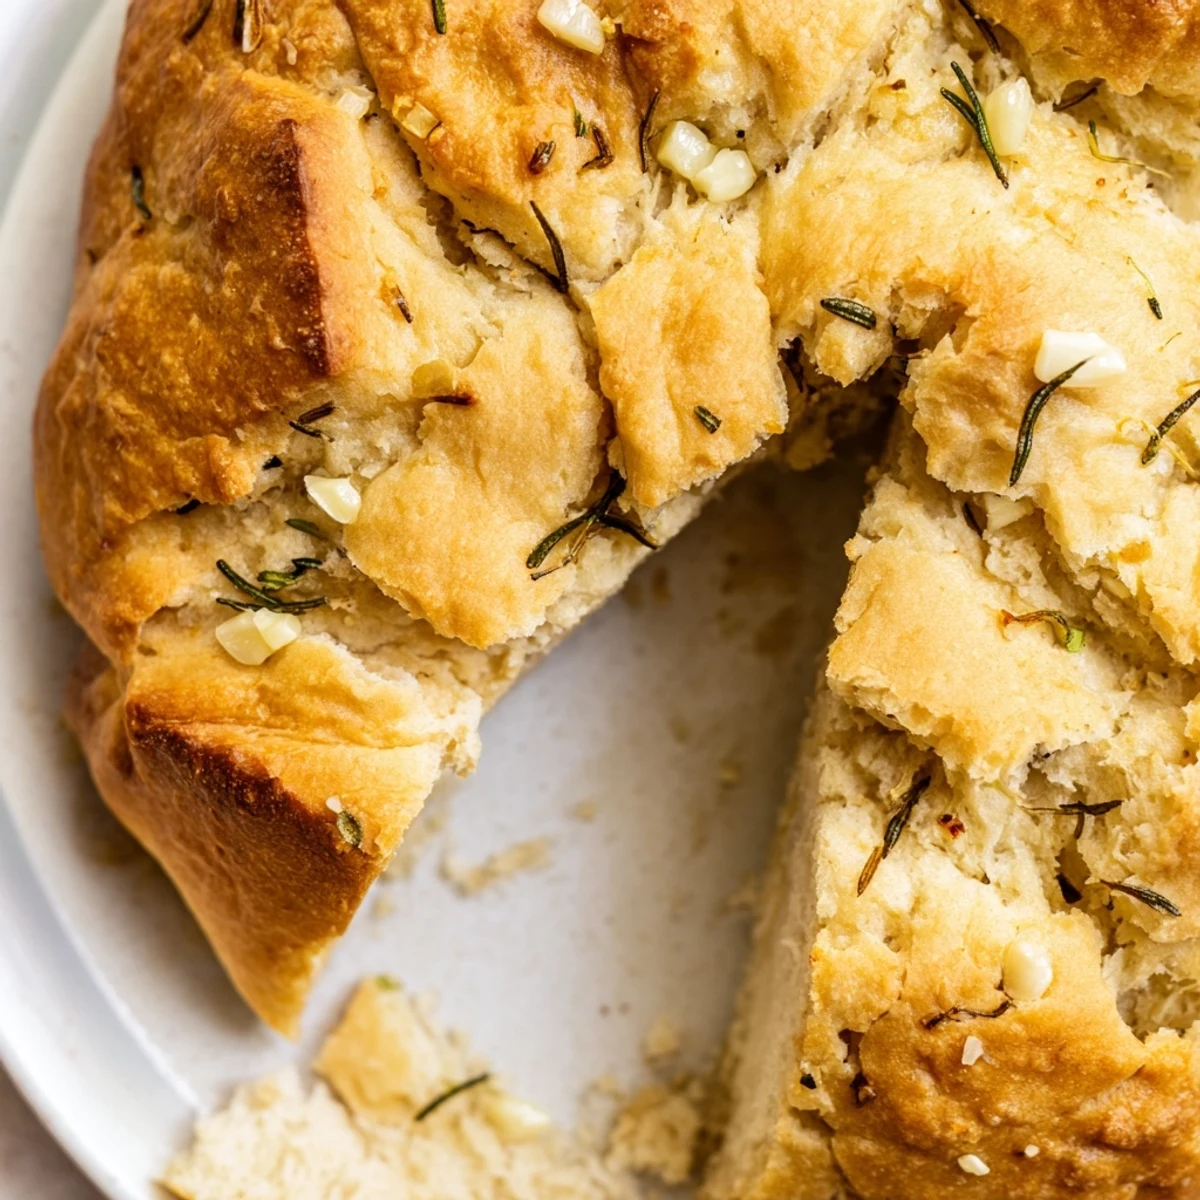
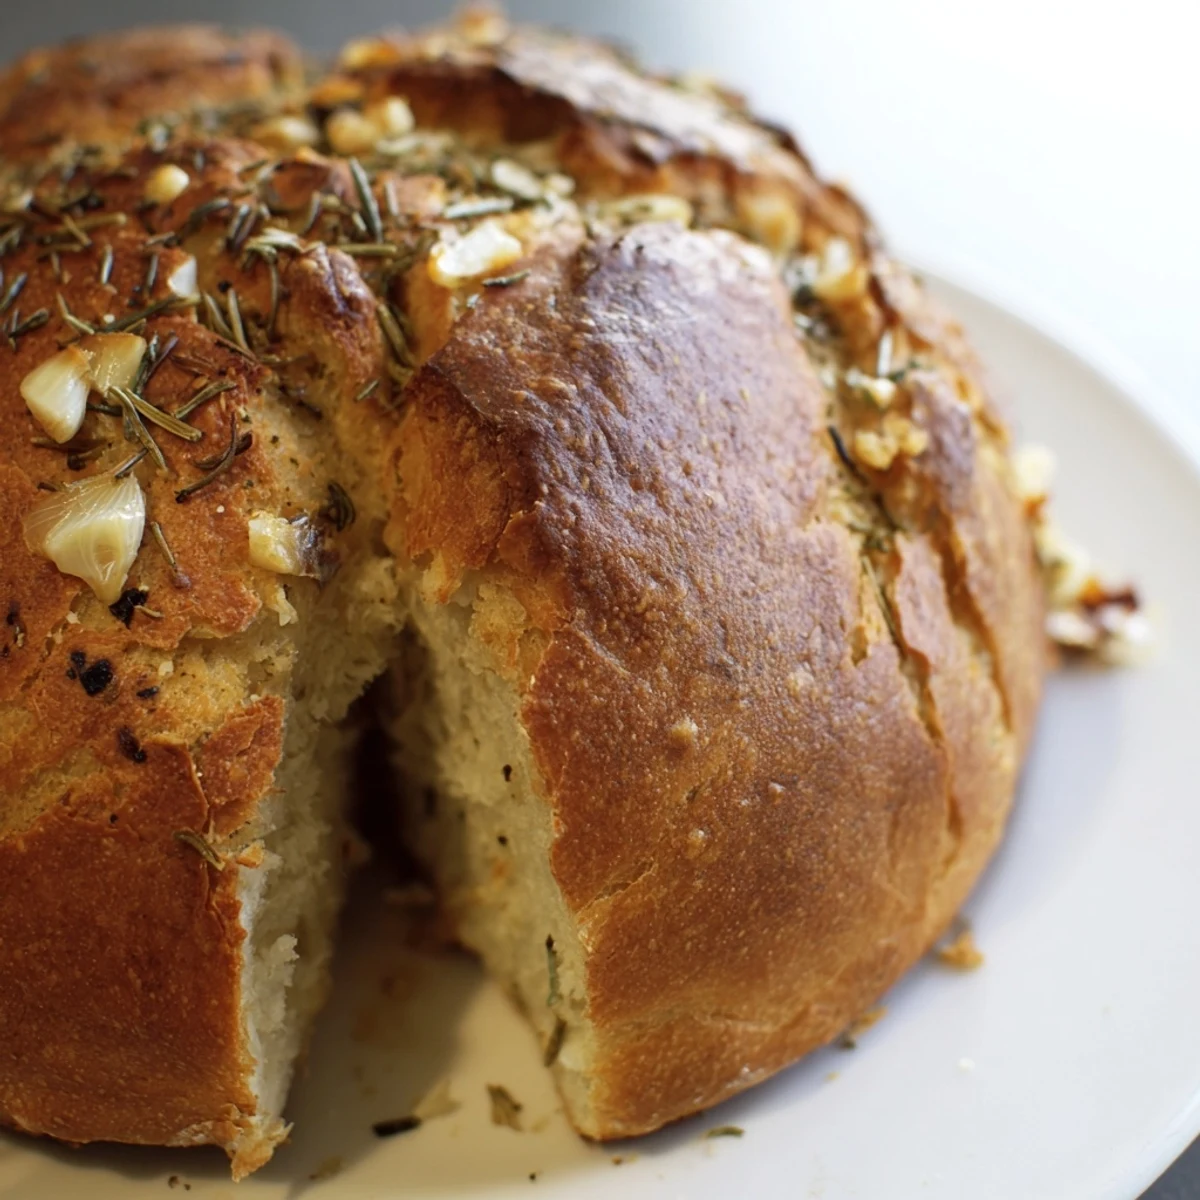
 This artisan loaf combines the convenience of no-knead preparation with traditional Dutch oven baking. The high-heat environment creates a professional bakery crust—golden, crackling, and substantial—while keeping the inside tender and airy.
Fresh minced garlic and finely chopped rosemary weave throughout the dough, releasing aromatic oils during baking. Each slice delivers savory herb notes balanced by the subtle sweetness of properly fermented bread flour.
The process involves a simple rise, then transferring directly into a preheated Dutch oven. The trapped steam generates exceptional oven spring, resulting in those coveted airy pockets and a beautifully blistered crust.
Serve warm alongside soups and stews, or slice thick for gourmet sandwiches. The flavor profile complements everything from sharp cheeses to roasted meats.
The smell of garlic and rosemary hitting that hot Dutch oven changed everything for me. I'd been making plain white bread for years, but the moment I pulled this fragrant loaf out, my kitchen felt like an artisan bakery. My husband wandered in from the garage, drawn by the aroma, and asked what bakery I'd secretly visited. That's when I knew this recipe would be a permanent fixture in our bread rotation.
Last winter, during that brutal week when everything was frozen solid, I made three loaves back to back. My neighbor came over complaining about her car not starting, and I slid a warm slice toward her with some softened butter. She sat at my counter, eating in silence for a full minute before finally asking for the recipe. Now she makes it every Sunday, and we've started this little tradition of swapping bread slices across our driveways.
Ingredients
- Bread flour: The higher protein content creates that satisfying chew and structure all-purpose flour just can't match
- Fine sea salt: Dissolves more evenly than kosher salt and won't leave those unexpected salty bursts in your bread
- Active dry yeast: Gives you that slow, steady rise that develops deeper flavor than instant varieties
- Lukewarm water: Should feel like a comfortable baby bath temperature, around 100°F, to wake up the yeast without killing it
- Olive oil: Keeps the crumb tender and adds just enough richness without making it heavy
- Fresh garlic: Minced finely so it disperses throughout the dough instead of clumping in spots
- Fresh rosemary: The woody needles hold up better than dried herbs, releasing their oils slowly during baking
- Extra flour or cornmeal: Prevents sticking and gives the bottom that professional bakery finish
Instructions
- Mix your dry base:
- Whisk the flour, salt, and yeast in a large bowl until everything is evenly distributed, about 30 seconds of whisking should do it
- Bring the dough together:
- Pour in the warm water and olive oil, stirring with a wooden spoon until you see a shaggy, sticky dough forming
- Add the aromatics:
- Fold in the minced garlic and chopped rosemary gently, just enough to distribute them evenly without overworking the dough
- Let it rise:
- Cover your bowl with plastic wrap or a damp towel, then walk away for 2 to 3 hours until the dough has doubled in size
- Shape the loaf:
- Turn the dough onto a floured surface and use floured hands to gently form it into a round ball, being careful not to deflate all those beautiful air bubbles
- Second rise:
- Place the dough seam-side down on parchment paper, cover loosely, and let it rest for another 30 to 45 minutes
- Preheat strategically:
- Put your Dutch oven and its lid in the oven and crank it to 450°F, letting everything get screaming hot for at least 30 minutes
- The transfer:
- Carefully lift the hot Dutch oven out, use the parchment like a sling to lower your dough inside, and put the lid back on immediately
- Bake covered:
- Let it steam-bake with the lid on for 30 minutes, creating that incredible crust
- Finish uncovered:
- Remove the lid and bake for another 12 to 15 minutes until the crust is deep golden brown and sounds hollow when tapped
- The hard part:
- Cool on a wire rack for at least 20 minutes before slicing, or the steam will escape and you'll end up with gummy bread
 Pin it
 My daughter now requests this bread for every birthday dinner instead of cake. We've started this little ritual where she helps me shape the dough, her small hands patting it into a slightly lopsided ball. The way she hovers by the oven window, watching the crust turn golden, reminds me why I fell in love with cooking in the first place.
Making It Your Own
Kalamata olives transform this into something completely different, adding briny bursts that cut through the garlic richness. Sun-dried tomatoes work beautifully too, though you'll want to pat them dry first so they don't make the dough too wet in spots. I've even experimented with adding shredded sharp cheddar, which creates these incredible salty pockets throughout the crumb.
The Science Behind the Steam
That covered Dutch oven creates a miniature steam chamber in your oven, which keeps the crust soft in the beginning while the interior expands rapidly. When you remove the lid, the sudden burst of heat dries out the exterior, creating that professional bakery crackle and deep golden color. It's the closest thing to a professional deck oven most home bakers will ever experience.
Storage and Leftover Strategy
This bread is absolute perfection on day one, with that shatteringly crisp crust giving way to a tender, aromatic interior. By day two, it still makes exceptional toast, each slice developing an even crunchier exterior that's perfect for poached eggs or avocado. If you somehow have leftovers after day three, transform them into croutons or bread crumbs rather than letting them go to waste.
- Store cut-side down on a cutting board, never in plastic, which turns the crust rubbery within hours
- Revive day-old bread in a 350°F oven for 5 to 10 minutes to restore some of that fresh-baked crispness
- Freeze extra loaves whole, wrapped tightly in foil, and thaw at room temperature before refreshing in a hot oven
 Pin it
 There's something profoundly satisfying about pulling a fragrant, golden loaf from your own oven. Share it with someone you love, and watch how bread turns strangers into family.
Recipe FAQs
- → Why use a Dutch oven for bread?
-
A Dutch oven creates a steam-filled environment that mimics professional deck ovens. The trapped moisture allows the bread to expand fully before the crust sets, resulting in superior oven spring and a crackling, golden crust that's difficult to achieve with regular baking sheets.
- → Can I use dried rosemary instead of fresh?
-
Fresh rosemary delivers brighter, more vibrant flavor, but dried works in a pinch. Use one-third the amount—about 2 teaspoons dried rosemary instead of 2 tablespoons fresh. Rehydrate the dried herbs in warm water for 10 minutes before adding to prevent them from drawing moisture from your dough.
- → How do I know when the bread is fully baked?
-
The crust should be deep golden brown, and the bottom should sound hollow when tapped. An instant thermometer inserted into the center should read between 190-200°F (88-93°C). If the crust browns too quickly, tent loosely with foil for the final minutes.
- → Can I add mix-ins like olives or cheese?
-
Absolutely. Kalamata olives, sun-dried tomatoes, roasted garlic, or cubed sharp cheddar complement this base beautifully. Fold them in during step 3 after adding the aromatics. Keep additions to about 1 cup total to maintain proper dough structure and rise.
- → Why is there so little yeast for this recipe?
-
The long fermentation time (2-3 hours) allows the yeast to develop flavor gradually. Less yeast with a longer rise creates deeper, more complex taste notes compared to fast-rising doughs. This slow approach also makes gluten development easier without extensive kneading.
- → How should I store leftover bread?
-
Wrap the cooled loaf in a clean kitchen towel or paper bag and store at room temperature for up to 2 days. Avoid plastic bags, which trap moisture and soften the crust. For longer storage, slice and freeze in a sealed bag—toast slices directly from frozen.